Validate a project from a filepath#
datashuttle can validate an existing
NeuroBlueprint-formatted project given only the filepath.
All NeuroBlueprint issues will be flagged along with the full filepath
to any problematic folders.
To quickly validate a project, start the terminal user interface with
datashuttle launch and click Validate Project From Path.
The screen below will show. To validate an existing project,
enter the full filepath to the project folder in the top input box
and click Validate:

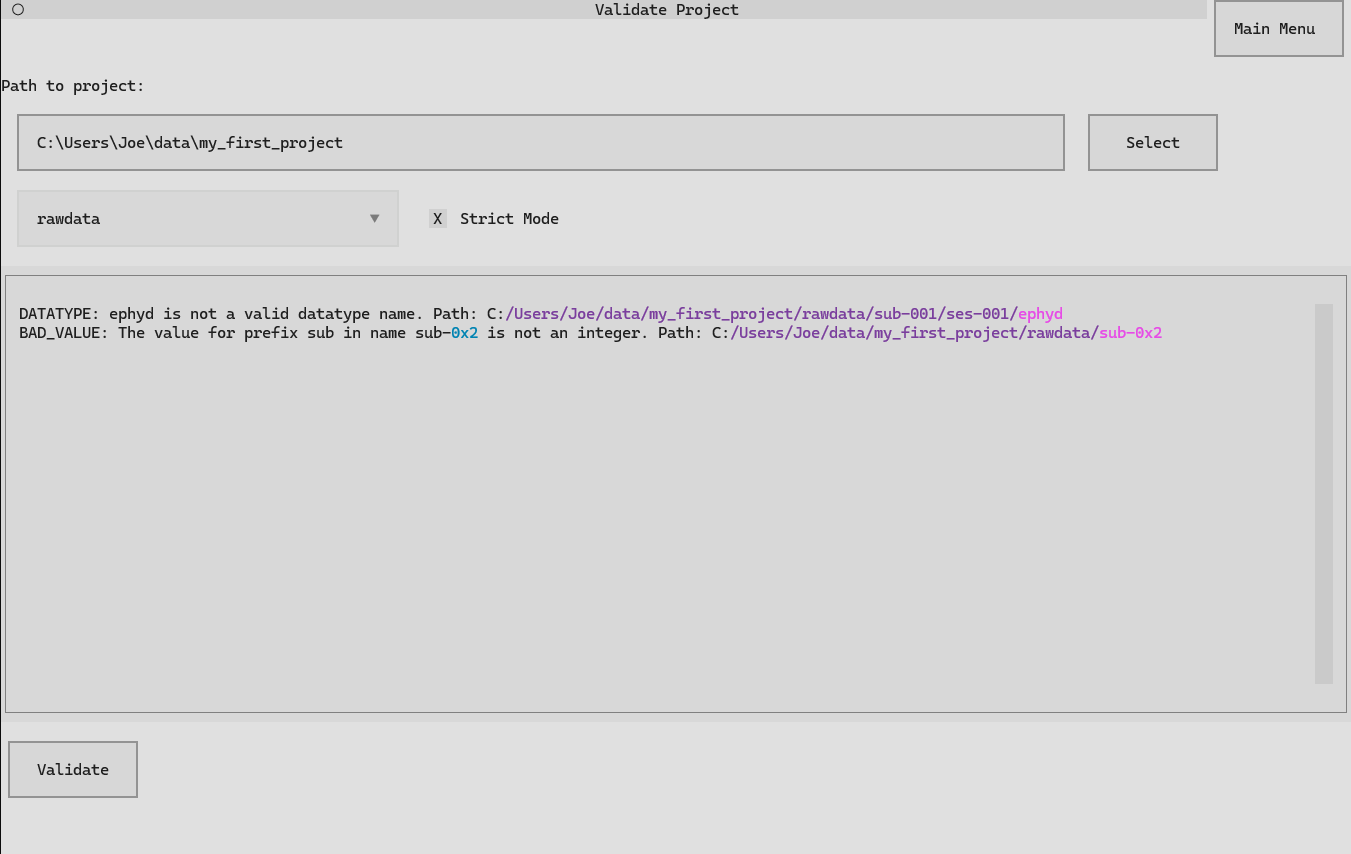
Any validation errors detected in the project will be displayed in the logging box.
See Strict Mode below for details on how the validation is performed.
See the Validate Folders page for full details on the arguments.
To validate a project using the Python API, pass the path
to the project to validate to validate_project_from_path:
from datashuttle import validate_project_from_path

validate_project_from_path(
    project_path="/mydrive/path/to/project/project_name",
    display_mode="error",
)
In this case, display_mode=error will result in an error on the first encountered validation issue.
Otherwise, "warn" will show a python warning for all detected issues, while "print" will print directly to the console.
See the Validate Folders tutorial and datashuttle.validate_project_from_path()
API documentation for full details of arguments.
More detail on validation options can be found in the Validation user guide.